HDD Rescue Adventures
Friday, September 11, 2020
As everybody knows “Make Backups (more than one!!) of your data!!” nowadays is as important as gaining enough sleep or eating healthy. But sometimes you are completely unprepared. This is exactly what happened to me a few days ago. A hard disk with very important source code for a project I’m currently working on suddenly stops working and the last backup was … some weeks ago.
So what to do? Besides calling me self a jackass I had to find a way to get back the data. After researching prices of some professional data rescue companies I came to the conclusion that trying to recover the data myself (and rewriting the lost source code in case my rescue attempt fails) would be cheaper and faster (project deadline is approaching with rapid steps).
So this post describes my journey into HDD data rescue. The disk in question was a Hitachi 320Gb model (HTS543232L9A300). After failing, the disk was no longer recognized by any OS. I could hear its motor start and the unlock of the r/w heads. Other than this it remains silent. This was good as it might be a sign that the problem is not a physical (destroyed head or platter) but an electronic one.
I found some information about the used PCB which contains an over-voltage protection diode and fuse. Checking these shows that they were OK. So it seems something else was wrong with the HDD controller board. On ebay I found a used HDD with equivalent model, MLC, PCB marks and HDD controller chip version. Only remaining problem was that each board contains a parameter block in its flash BIOS (which holds the controller firmware) thus making each disk individual. Just changing the HDD PCB was not enough.
One way to solve this is replacing the whole BIOS chip, de-soldering it from the old board and soldering it into the new board. Too much effort especially as the chip was a very narrow SOIC type and de/soldering one of these is not that easy. While inspecting the board I noticed lots of test points also near the BIOS. So why not try to read out the original flash including the parameters needed for the old disk and reflash it to
the new board which is then mounted back to the old disk?

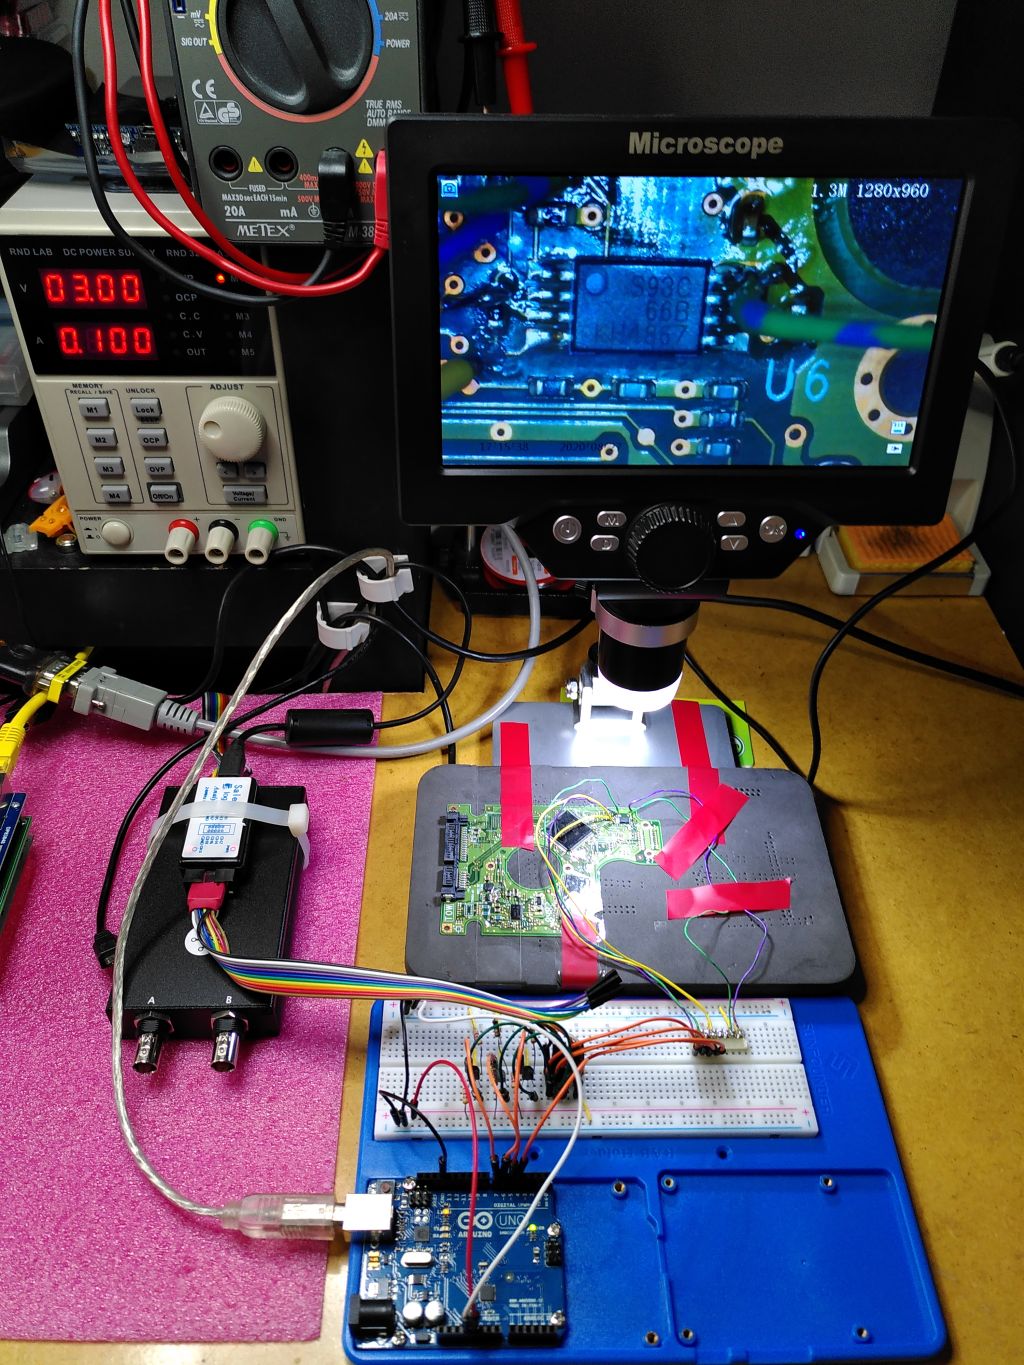
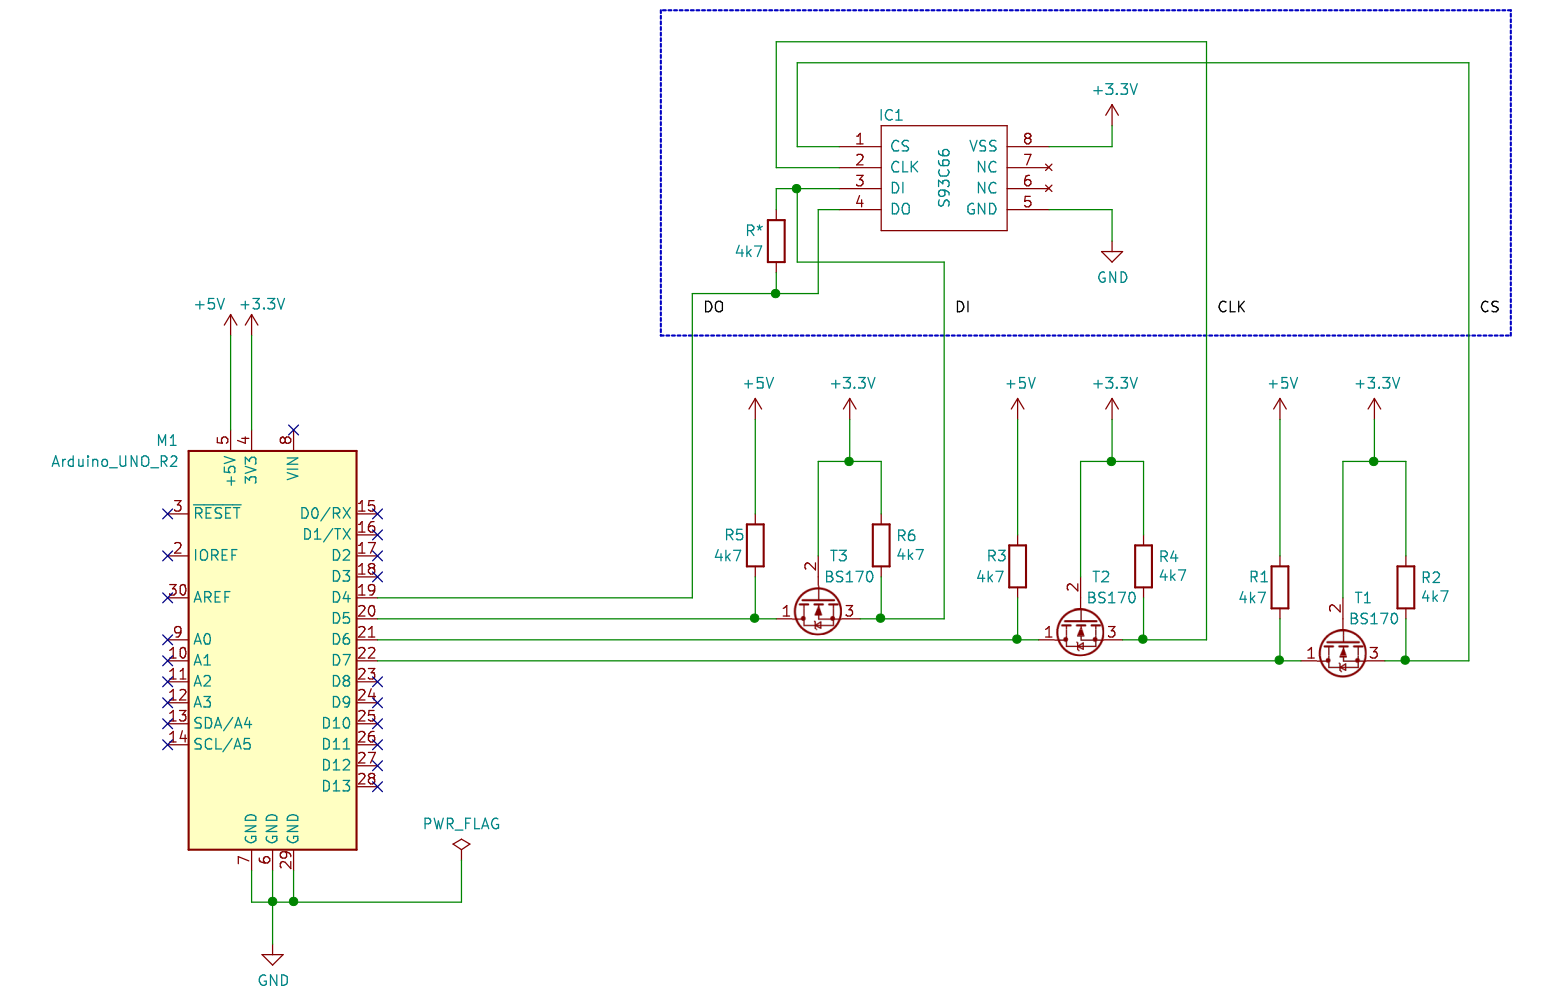
The BIOS flash is a 512 byte S93C66 serial EEPROM. Using an Arduino UNO, some components from my electronic junk yard and six wires I was able to created a simple programmer for the S93C66 flash. The CS, CLK and DI lines need some level shifter from Arduinos 5V to 3V. Also note the resistor R* in the schematic. Its between the DI and DO pins on the PCB and allows one signal line to be saved for the HDD controller chip. The blue box shows part of the HDD controller PCB.
I built the circuit on a breadboard, soldered some wires for CS, CLK, DI and DO to the test-pads on the PCB and wrote some code for the Arduino which shows the following menu after reset:
S93C Flash Tool V1.0
— Main tools —
d   - Dump as HEX
D   - Dump as HEX with CRC
a   - Dump as ASCII
A   - Dump as ASCII (one-by-one)
u   - Upload HEX
U   - Upload HEX with CRC
E   - Erase All
— Development tools —
S/s - Chip select On/Off
C/c - Clock On/Off
I/i - Data-IN On/Off
r   - Report Data-OUT state
R   - Reset all signals
t   - Read 2 words at addr 0×00
T   - Test write to addr 0×00
W/w - Write mode On/Off
h/? - This help
>
The dump commands d/D can show the flash contents in hex with or without a CRC.
0000 : 43343043038eddfc : 54
0004 : 040100002b3ee203 : 53
0008 : 002c000000000000 : 2c
000c : 00000c013b7c0054 : 18
0010 : f402083000010203 : 34
0014 : 08b02e404b054700 : bd
0018 : 08b02e4043054400 : b2
. . .
This dump can later be used with the upload commands u/U to write it into the flash. The Arduino serial monitor is not usable for this so you have to use a standard serial Terminal like GTKTerm.
Note: Be sure to set “End of line delay” to 100ms in Configuration / Advanced Configuration Options / ASCII File Transfer.
The a/A command dumps out the human readable ASCII contents.
C40C….
….+>..
.,……
….;|.T
…0….
…@K.G.
…@C.D.
. . .
SUCCESS
After transplanting the BIOS and parameters from the failing HDD PCB to the new one and mounting it on the HDD drive enclosure, it was immediately recognized by Linux and I could read out the data!!!
Code can be found on Github