Resolving product shortcomings
Tuesday, November 10, 2020
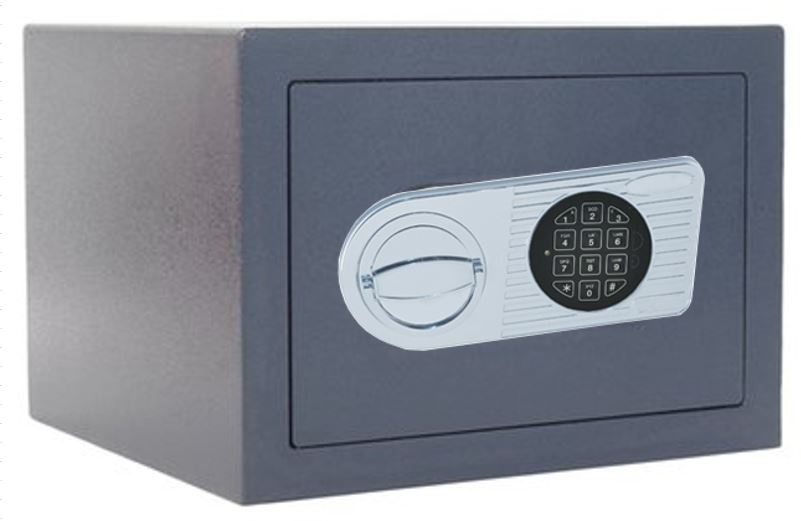 Recently I bought a document safe. This was necessary because some types of documents need to be kept safe even during still ongoing COVID-19 home office. I choose a model with a security grade necessary to legally comply required by the type of documents I work with. And I choose one with a digital keypad so I don’t have to have a physical key but a numeric code. From the time it was ordered, it took about a week to be delivered and some effort (weighs around 50kg) to get it into place. After I put in a fresh 9V battery, set up a security code, and put in some documents, I was done - I thought ….
Some days later I needed one of the documents. So I entered the code - but - nothing happens. No key beep when entering the code and no unlock of the door. Hmm. Must be a dead battery. I was pretty sure I used a fresh one but OK maybe it was bad. But the battery was in a holder INSIDE the safe. Fortunately the digital lock provides the possibility to apply power from outside in the case of a dead battery. Bought a new one, applied power from outside to open the safe, changed the empty on against the full battery and finally got my document. But it left a strange feeling and so from that moment on I tried to open it every day.
On the sixth day the battery was empty again. What was going on here. I performed the test again with another battery brand. Five days later the same. After I contacted the seller and described the problem to them, they exchanged the safe. I performed the tests again right after receiving the new one - and - it had the same issue as the other one. Battery was empty after about a week. So this must either be a serial failure of that type of model or a design flaw. Problem was that this model had exactly the dimensions and rating I needed. The seller was willing to give me credit if I kept it. So I kept it and thought about a solution for this shortcoming.
Design
This post describes the “Power-Guard” which prolongs battery life from a few days up to about a year.
Researching the safes lock mechanism revealed that it consists of two parts: an M-Locks Rotobolt EM2020 lock mechanic with accompanying ST4020 keypad. With this information I started my investigations. First power consumption was measured.
| Action | Power consumtion |
| Idle | ~6mA |
| Active Key Entry | ~10mA |
| Unlock | ~200mA |
A standard 9V battery has an average capacity of about 550mAh. With an idle consumption of ~6mA such a 9V battery holds not even a whole week. How can this be? An electronic lock with such a battery life is more or less useless. Without reverse engineering the whole electronic and to be as much non-intrusive as possible, how can idle power consumption be reduced? Active key entry and unlock consumption cannot be reduced and last only for a few seconds. So my idea was to design a device inserted between the 9V battery and the lock electronics limiting the idle power consumption down to a few nano Ampere which gives a much longer battery live.
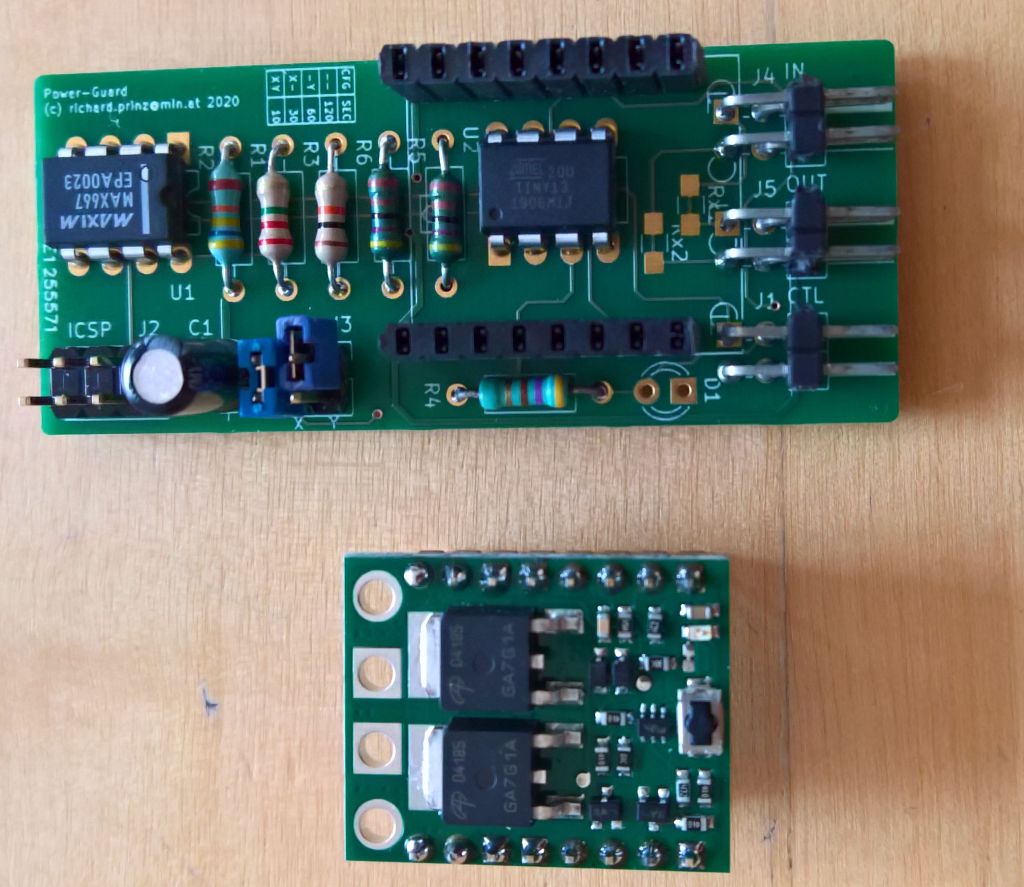
The design uses a Pololu 2812 power-switch controlled by n Microchip ATiny13 supported by a MAX667 voltage regulator and low-battery detector. No SMD parts are used so it could be easily built on a piece of perfboard. Part costs about EUR 20,–

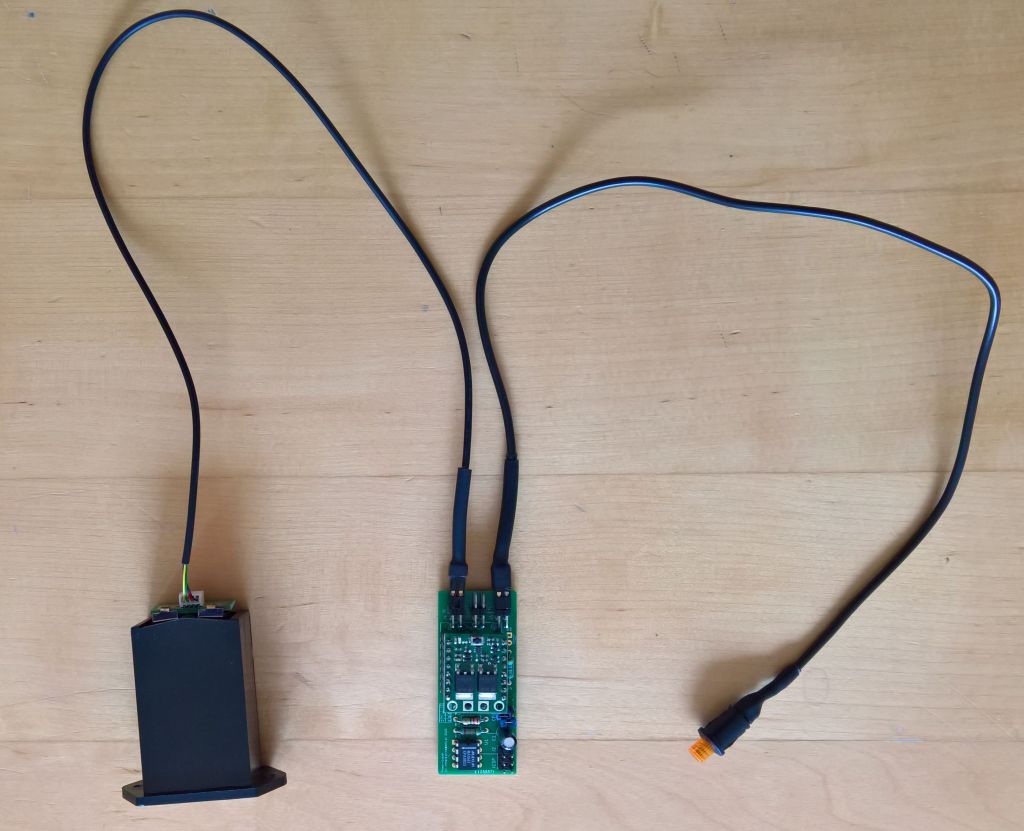
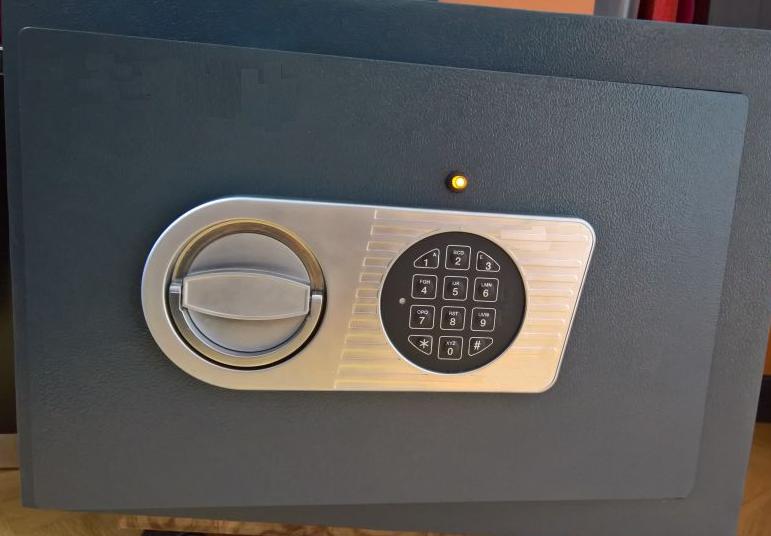
Its main purpose is to disconnect the 9V battery from the safes lock electronics to reduce power consumption. A push button with integrated LED must be pressed before entering the key code. The power-guard then monitors power consumption and automatically disconnects after a configurable amount of time. If battery voltage is below a defined threshold the LED begins to blink. Automatic power disconnect can be configured with jumper J3 to be 10, 30, 60 or 360 seconds. Low battery warning is defined as ~7,5V.
Installation
The installation was relatively easy. The inner part of the safe door could easily be removed. The cable from battery holder to lock electronics must be unplugged and connected to power-guard J4. J5 is then connected to lock electronics and J1 provides LED and button connection.
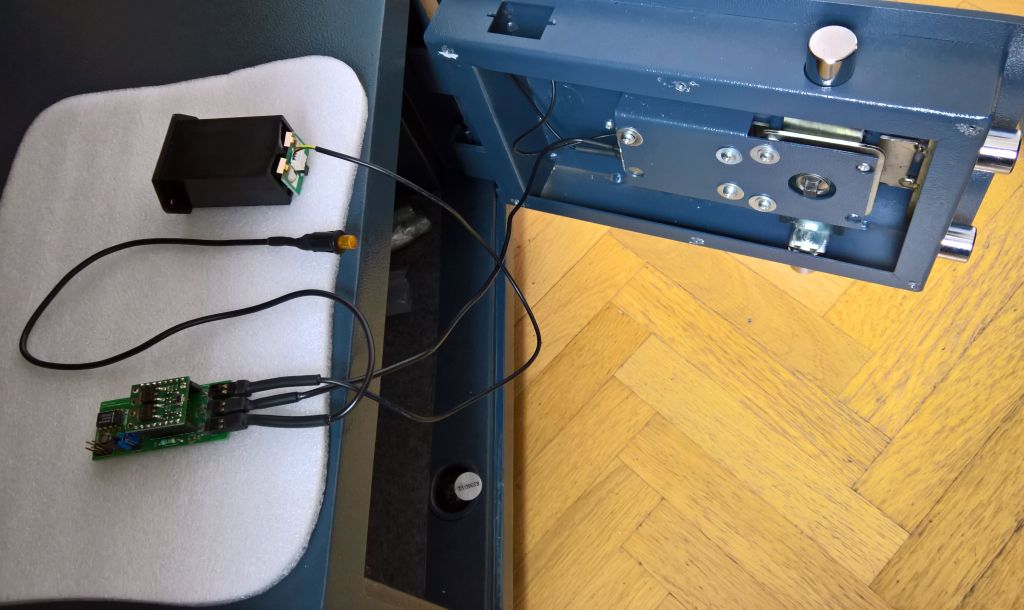
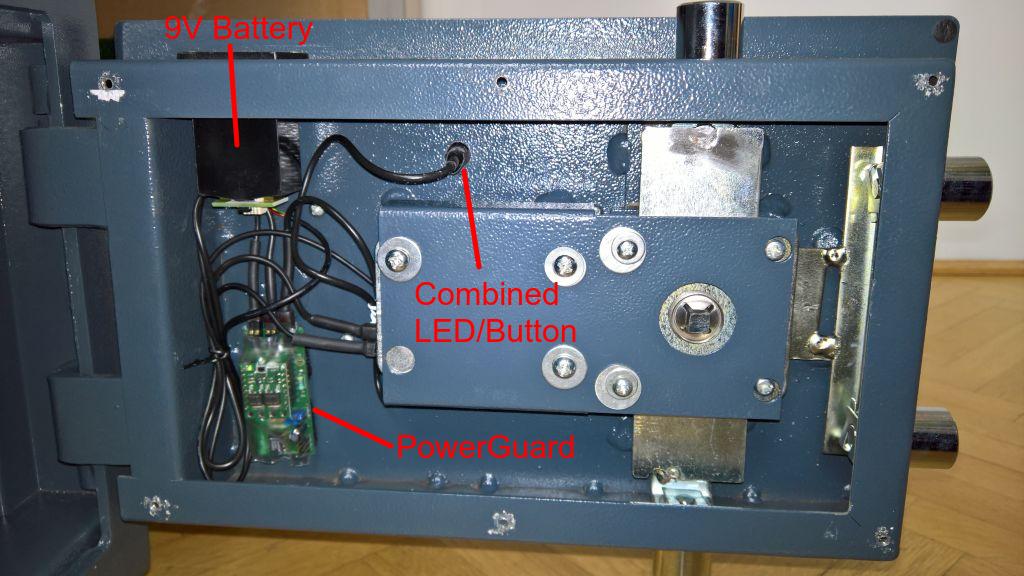
Installing the control button was a little challenging. The electronic keypad can be removed with 5 screws from inside the safe door. So the control button can be integrated somewhere in the
keypad housing. Another possibility is to drill a hole above the keypad assembly and place the button there. This has the advantage that the whole keypad/lock must not be disassembled.
By just pressing one button more when opening the safe the product now is much more useful - no new battery every week. The same would be possible by designing the lock electronics right …..
Usage notes
The original lock and keypad provide some security features like a 5 minute lockout after four wrong key entries. Power-Guard does not interfere with these. After four wrong key entries the 5 minute key-lockout state is retained even when power is turned off by pressing the power button. After powering on again, its still not possible to open the lock until the full 5 minutes are over.
WARNING: The 5 minute key-lockout period starts when power is turned on. When power is turned off BEFORE this period is over its starts again from 0 next time power is turned on. So when Power-Guard is configured for a power off timeout less then 5 minutes, its not possible to come out of key-lockout! The only way to come out of this state is to apply external power for more than 5 minutes. In case Power-Guard is configured for a power-off timeout greater 5 minutes - just leave it turned on until it powers off to come out of key-lock state.